Operating Manual
Table of contents
Product description of the machine
Intended Use
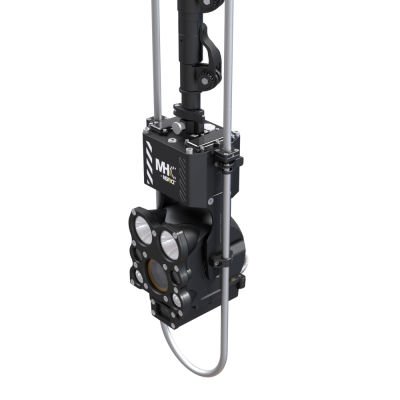
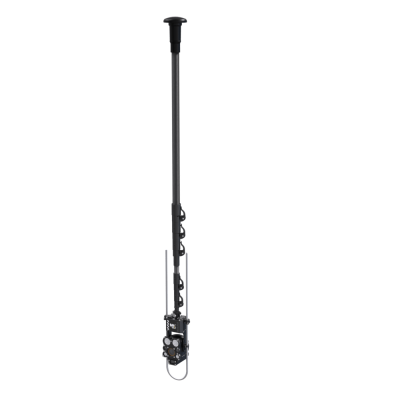
The NSP3CT MHC electronic manhole inspection device is used for inspecting shafts and cavities. Operation is permitted only by qualified personnel. The manhole inspection device is only used as intended if all specifications contained in this manual are observed.
- Safety
- Operation
- Maintenance and Maintenance
Improper Use
Any other or additional use will be considered improper use.
In the event of improper use, the manufacturer’s liability under the Product Liability Act is void.
Technical Data
Technical Data Camera System
| Deployment range | DN150 and larger |
| Resolution | 1920 x 1080p |
| Light Sensitivity | 0,05 LUX |
| Optical Zoom | 30x |
| Digital Zoom | 16x |
| Focus Mode | Autofocus/Manually adjustable | Tilt range | -90° to +20° |
| Pressure resistance | 1 bar |
| Lighting | 2 X 1,5 W LED with Reflector 2 X 9 W LED (medium range) 2 X 3 W LED (close range) |
| Power supply | 3 X Batteries (2.5h Runtime) |
| Data transmission | WIFI |
| WIFI Repeater | optional |
| Steering | Android-Tablet (App) |
| Case material | Anodized Aluminum |
| Dimensions | 163 X 158 X 773 mm |
| Weight | approx. 3 kg (without Tripod) |
| Operating temperature | 0 to 40°C |
| Detection distance | 1.5 to 70 m |
| Measurement accuracy | ±5cm |
| Protection class | IP68 |
Technical Data Telescopic Pole
| Material | Carbon fiber |
| Length | 8 m |
| Extension | 4 m |
| Centering Bracket | 0,8 m |
| Weight | 2 kg / Extension 1.2 kg |
Commissioning
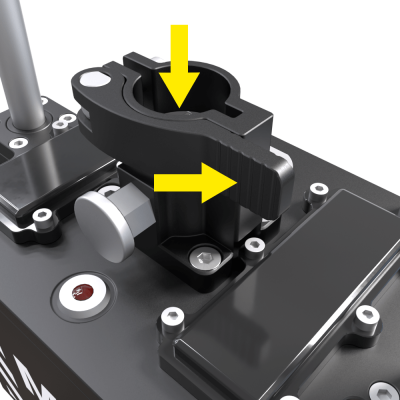
Setup
- Open the lock
- Insert telescopic rod into the locking unit
- Close the clamp
- Check the fit
- Assembly complete
Notice
- Check the fit of the telescopic pole.
- Check the fit of the bracket.
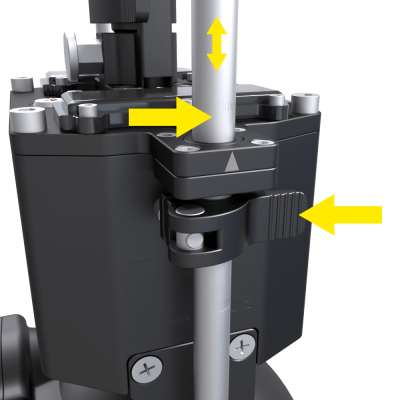
Setup
- Open the brackets on both sides and adjust the camera height using the scale.
- Close the bracket.
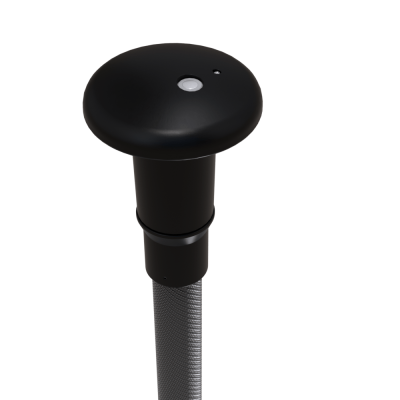
Setup
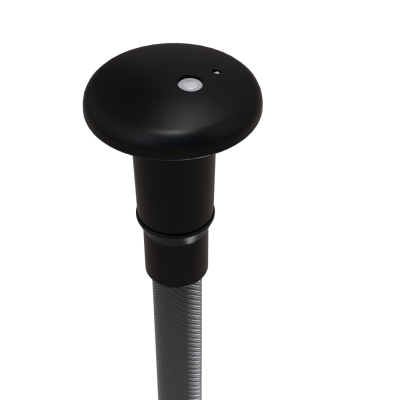
- Attach the repeater to the telescopic pole mount and secure it.
Notice
- Insert the repeater completely.
- Check that it is firmly seated.
Setup
- To charge, the components are placed in the charger.
- The display shows the status.
Operation / User Interface
Turn on/off
TURN ON
Press the camera’s power button and wait until the LED lights up.
TURN OFF
Close the app on the tablet. Then press the camera’s power button to turn off the system. The LED will flash. Pressing the button again will turn the camera off completely.
Establish connection between the components
The camera is designed for use with a Wi-Fi connection. Use an Android tablet and launch the app.
It will then search for all available devices on the Wi-Fi network. Connect the tablet to the device.Allow the app access to the tablet’s features (image gallery, GPS, and location services).
By default, the Wi-Fi name is the device name and the password is: 12345678
Use
The app’s user interface is simple. In the basic layout, the sidebars are displayed on the left and right.
Function keys
- Camera panning
- Camera zoom/focus
- Adjust lighting
- Start video recording
- Take a photo
- Switch off
The current live image is always displayed in the background, possibly with data overlays.
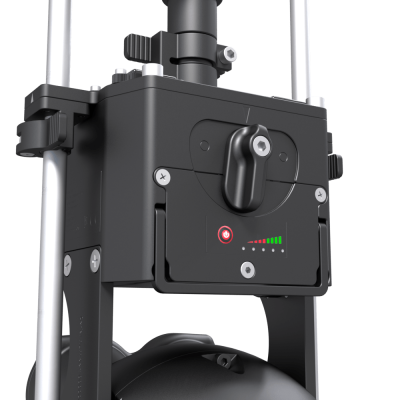
Charging the device, batteries and repeater
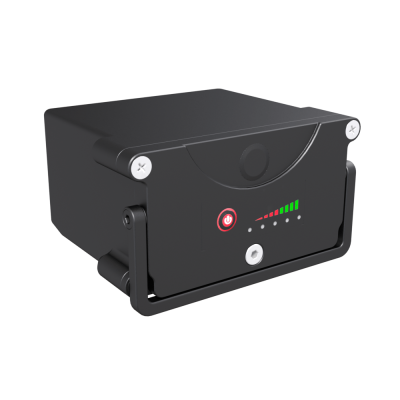
The channel mirror’s batteries and charger are designed for a long service life and short charging times. When the charge level indicator on the battery in the device shows only one bar, it’s time to charge the battery.
- Insert the battery module into the charging station.
- Connect the charging device to the mains.
- Disconnect the charging device from the mains after it is fully charged.
- Remove the battery from the charging station after it is fully charged.
Optional: Attachment of the tripod
- Attach the tripod to the carbon rod at a height of approximately 1 to 1.5 meters.
- Open the clamps on the tripod legs at the top to extend them. Then close the clamps again. Ensure the tripod is stable.
Overview of the function keys and display elements
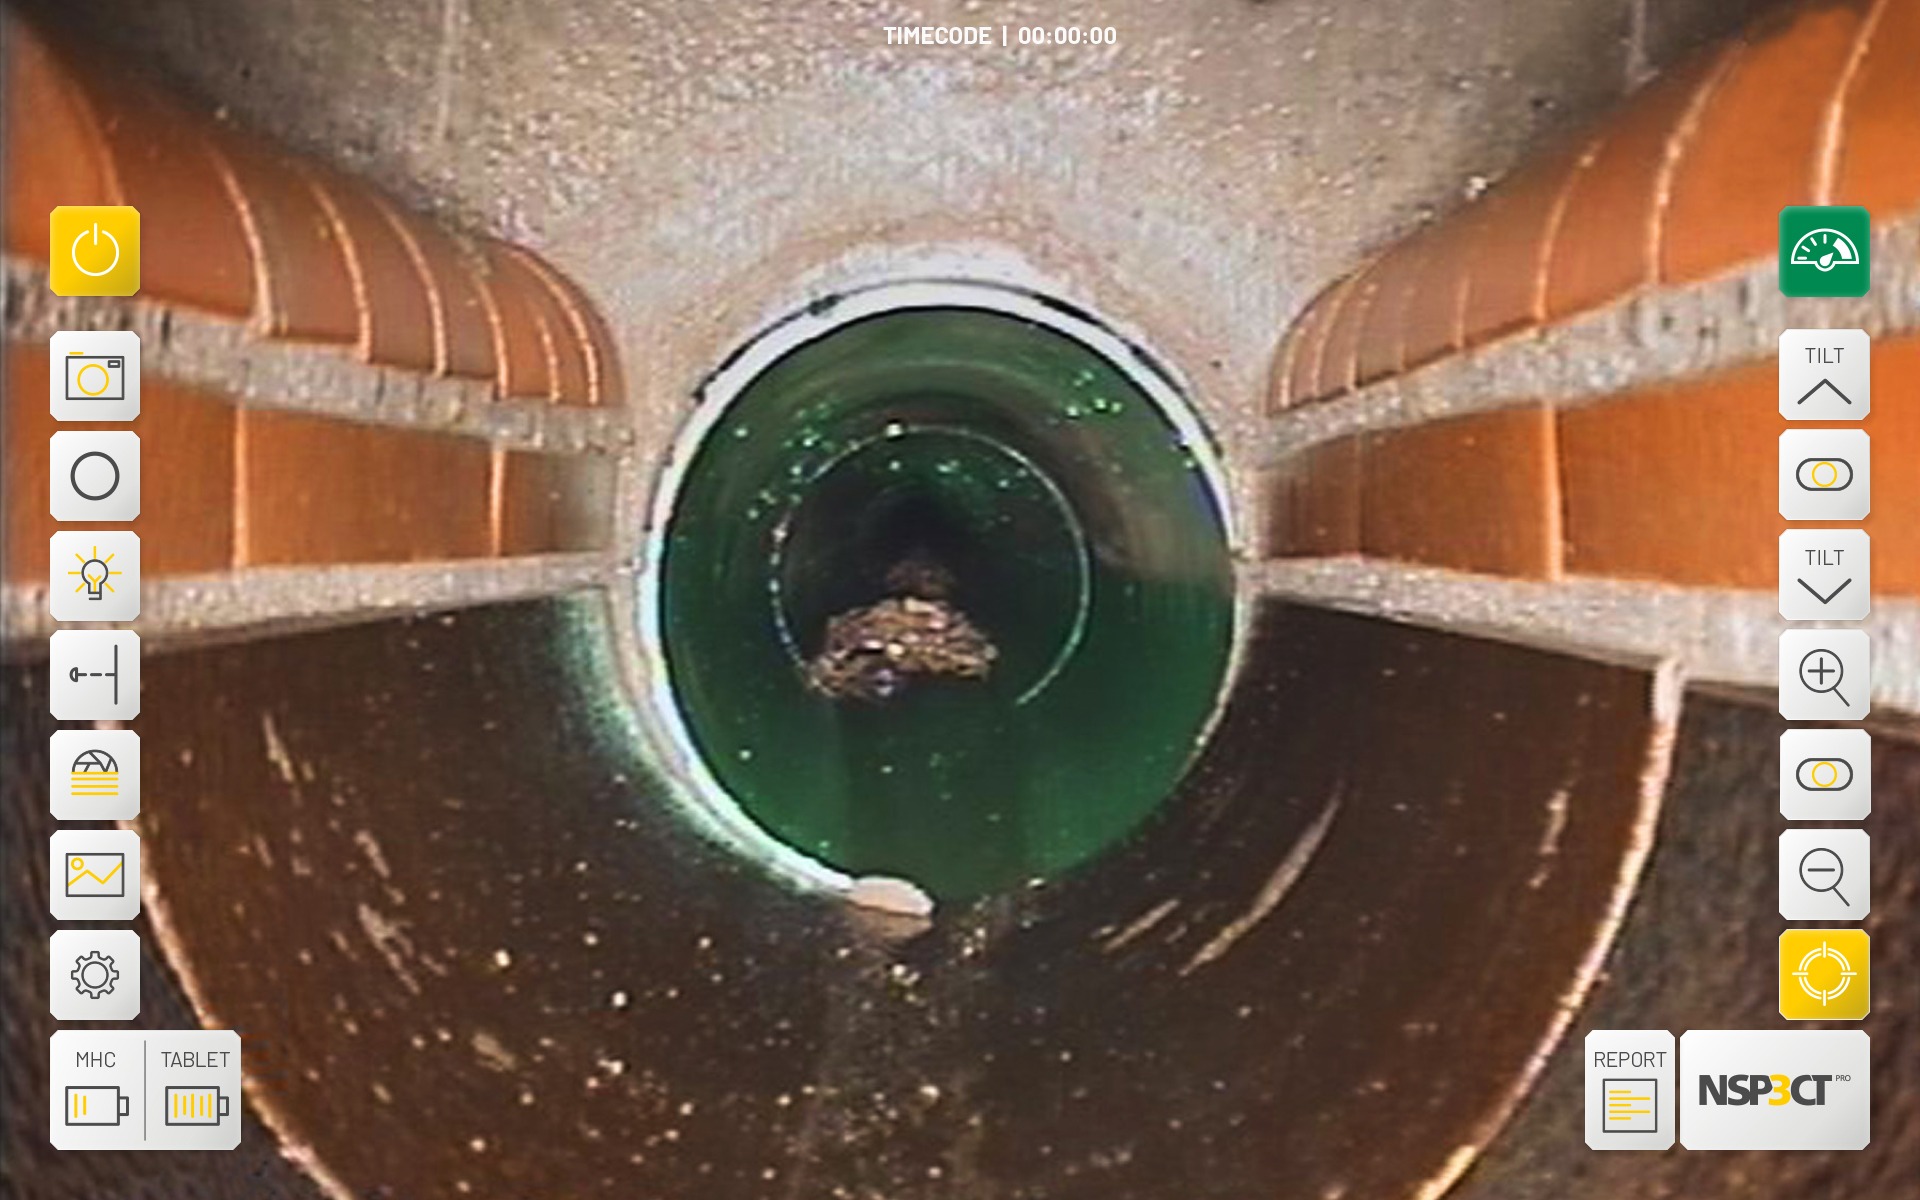
Timecode
Continuous timecode written into the video
Turn on/off
The following information is permanently written to the recorded video:
- First line: Date of recording
- Second line: Time of recording
The settings for this can be accessed in the “Settings” menu on the main screen.
Capture photo
Captues an photo of the current camera image.
Record video
- Press the Record button: Recording starts. The button changes to the “Pause” icon.
- Press the pause button: Pauses recording. Timecode pauses. The button changes to the “record” icon.
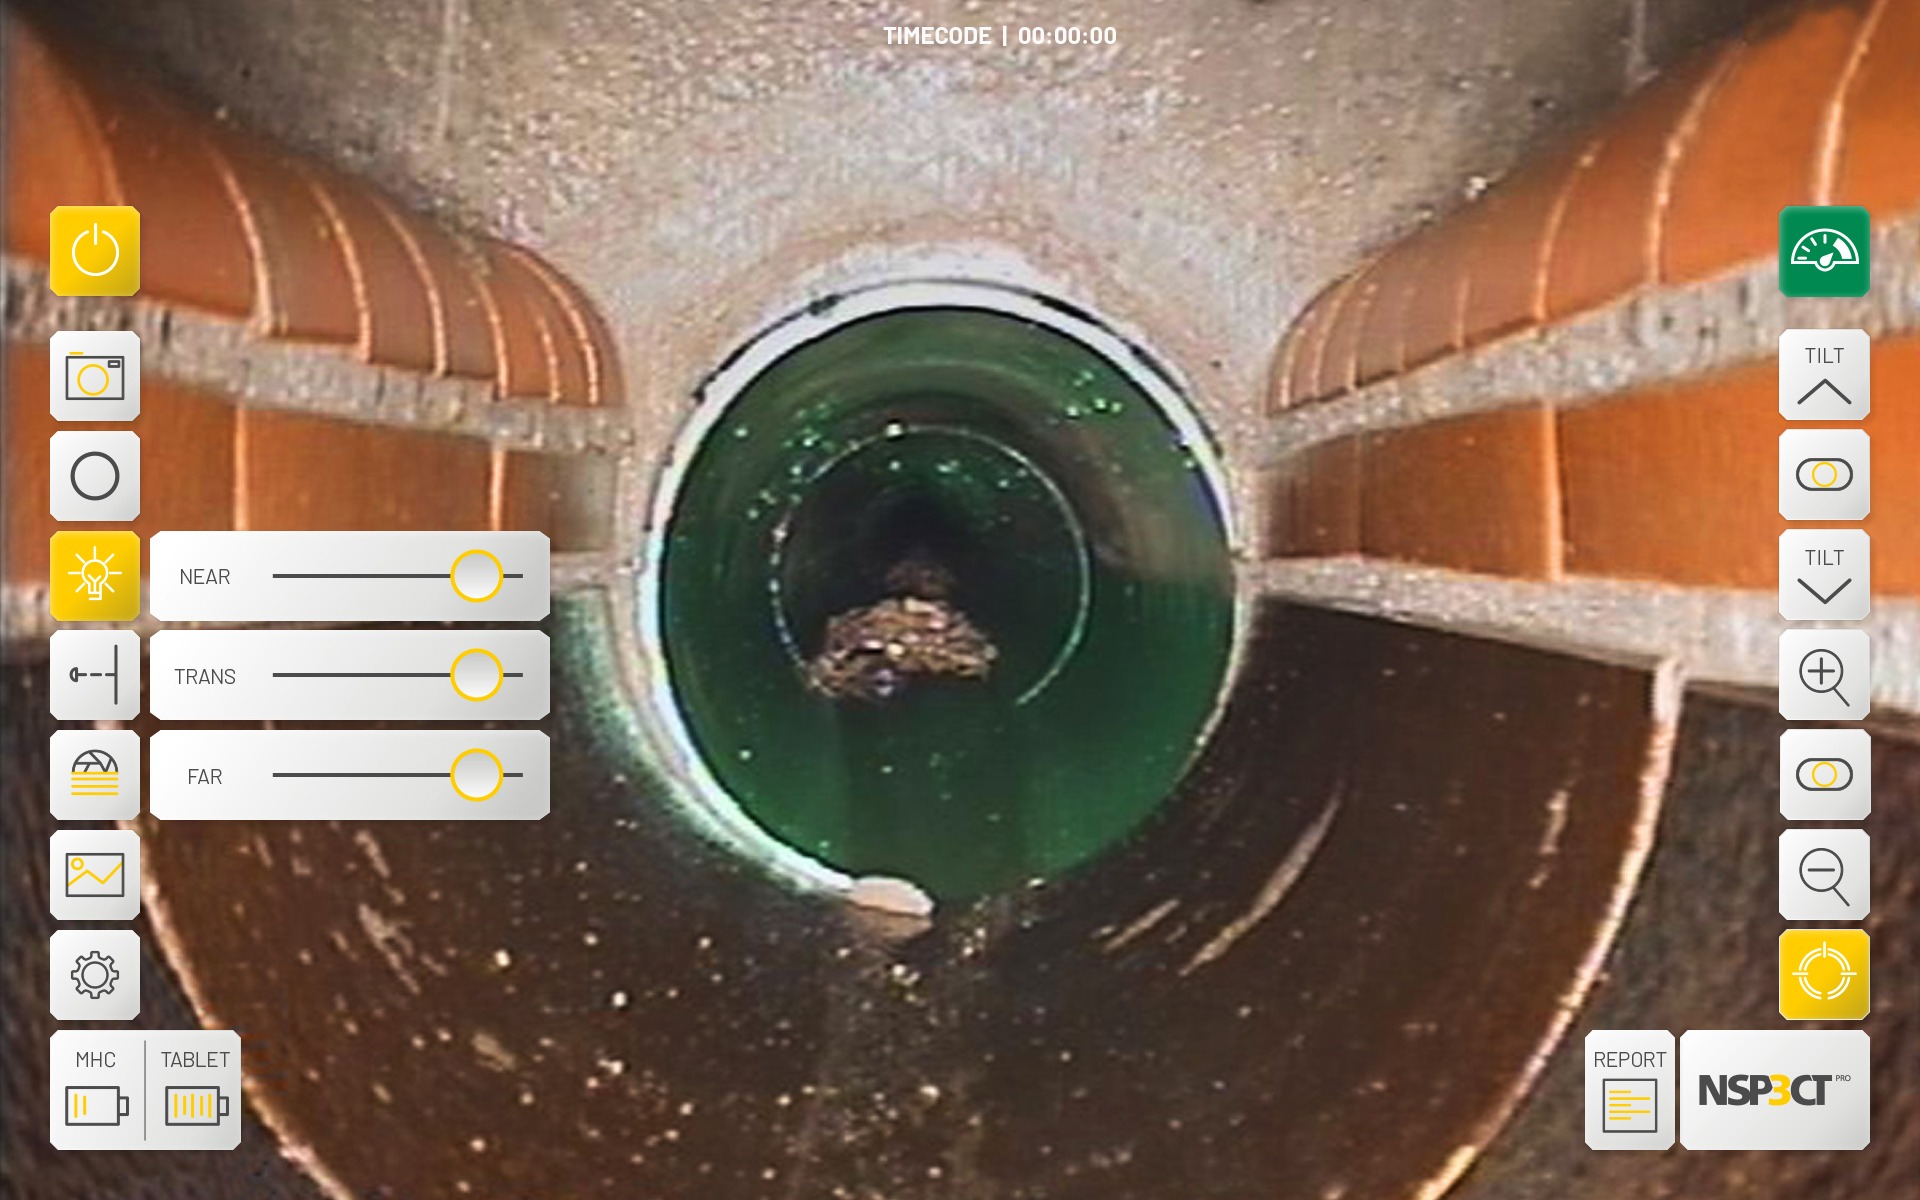
Control lighting
Pressing the button opens a slider for continuous adjustment of the lighting intensity.
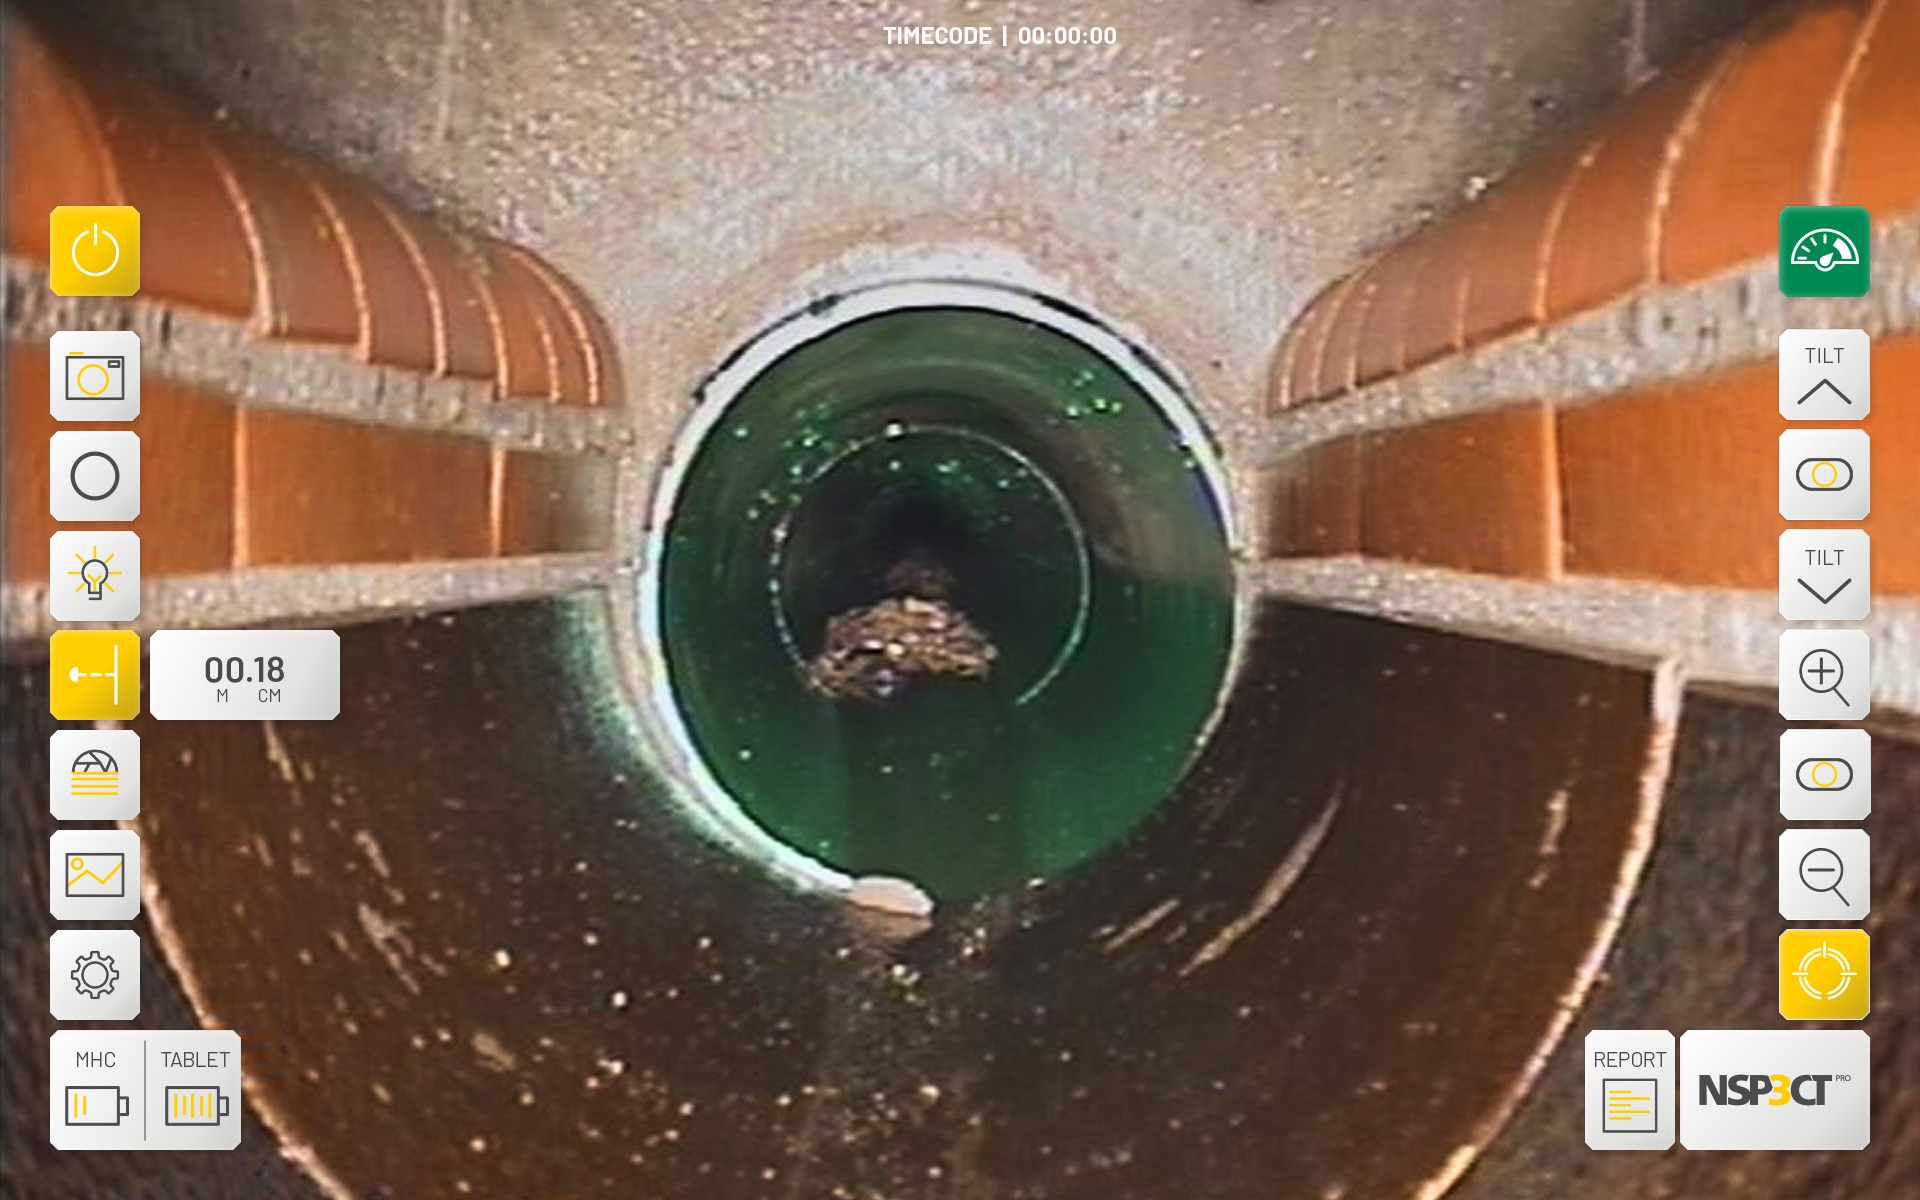
Distance measurement
Defogging
Press the defogging button The camera lens is heated to prevent or eliminate fogging caused by humidity.
Media preview
Opens the image and video preview as well as controls and file information for the selected image or video
Settings
Leads to the camera settings menu
Charging status
Shows the current charging status of MHC and tablet
Pressure indicator
Please check the internal pressure before use. If it falls below 0.5 bar, refill. (Target pressure: 0.8 bar).
Tilt camera upwards
Center camera
Tilt camera downwards
Zoom in
Zoom Zero
Press the magnifying glass button Resets the zoom to zero.
Zoom out
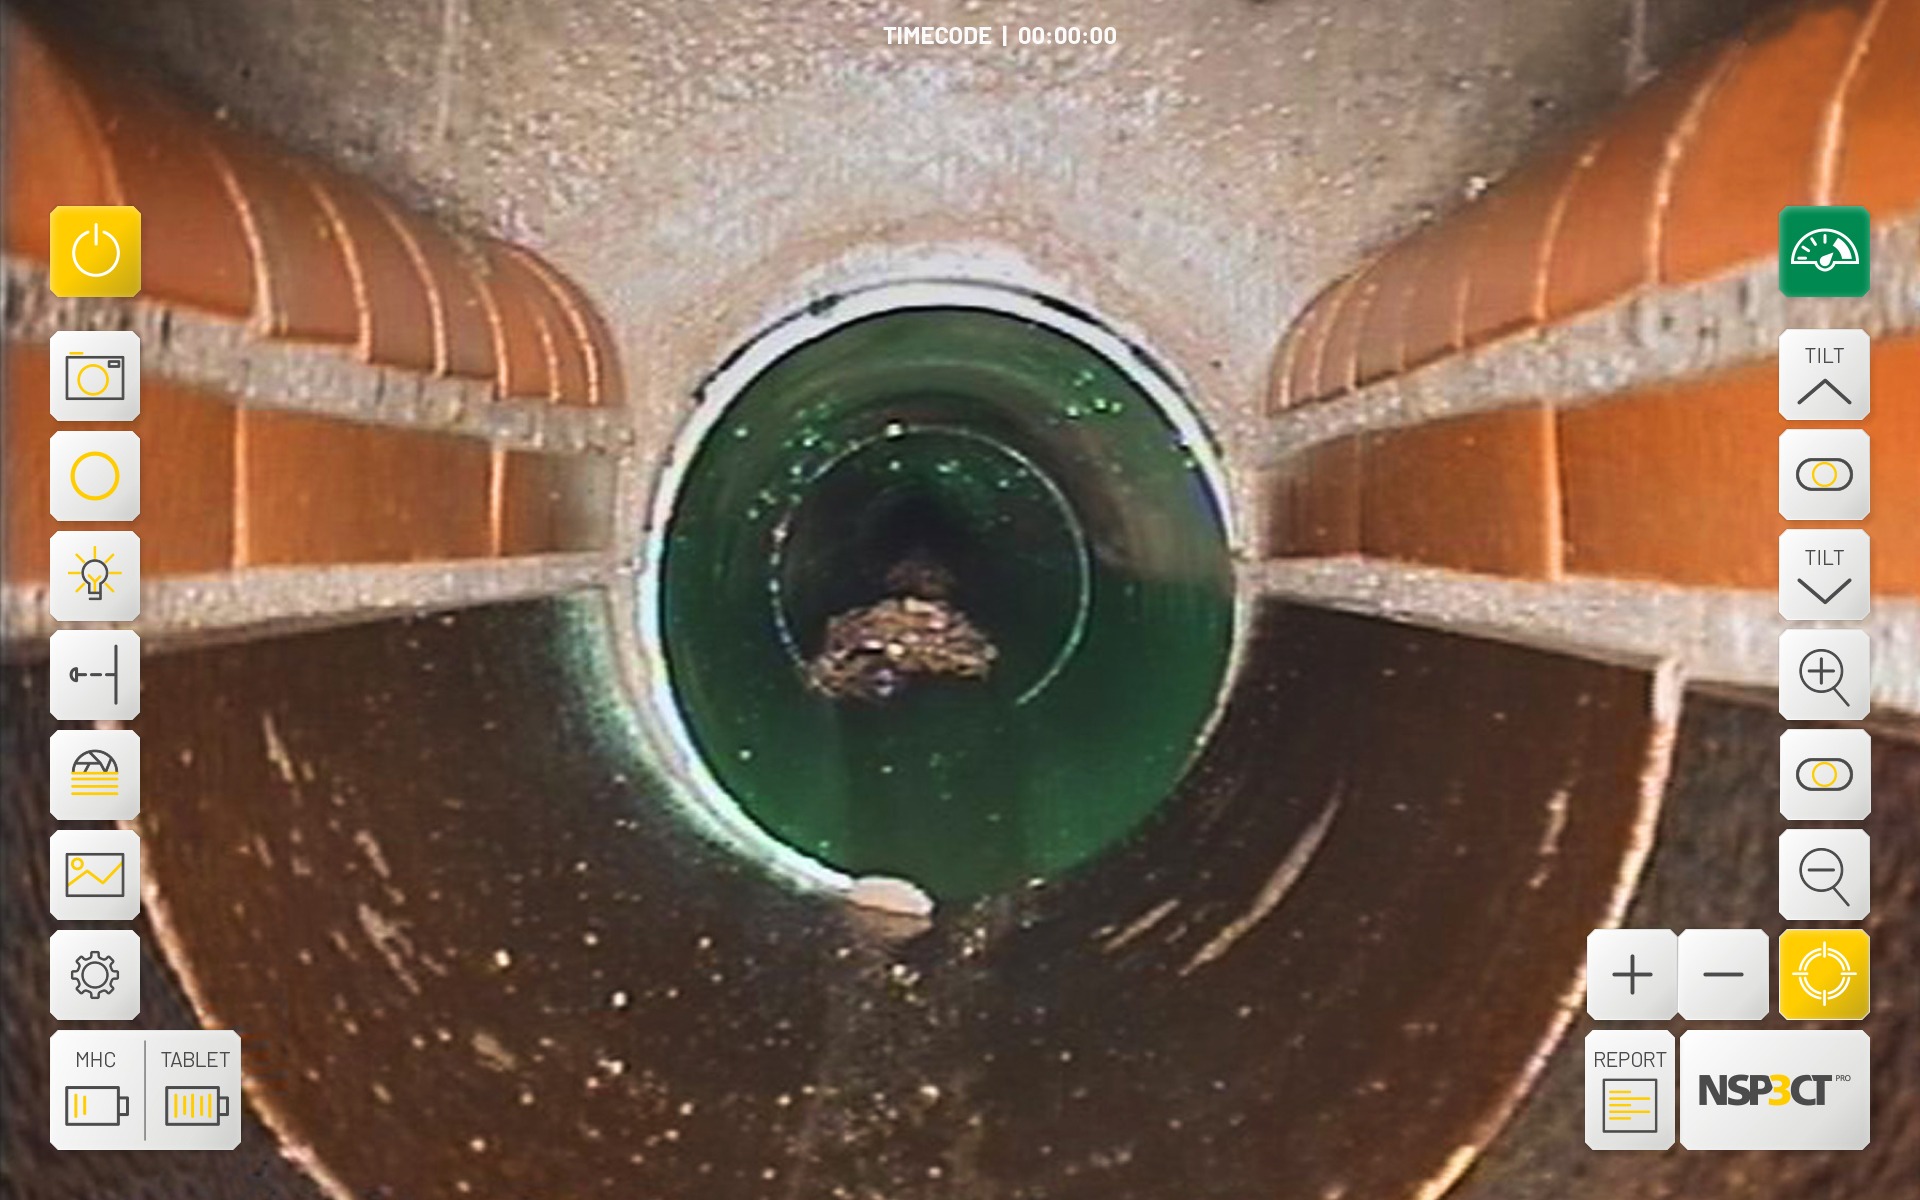
Focus
Opens function keys for manually adjusting the focus area.
Report
Generate a report.
Turn on/off
Captures a picture of the current camera image.
Capture picture
Camera Symbol
Captures a photo of the current camera image.
Record Video
Record Symbol
- Press the record button: Recording starts. The button changes to the “Pause” icon.
- Press the pause button: Pauses recording. Timecode pauses. The button changes to the “Record” icon.
Control lighting
Lightbulb Symbol
Pressing the button opens a slider for continuous adjustment of the lighting intensity,
Distance measurement
Laser Measurement Symbol
Defogging
Lense Symbol
Press the defogging button The camera lens is heated to prevent or eliminate fogging caused by humidity.
Media Preview
Galery Symbol
Opens the image and video preview as well as controls and file information for the selected image or video
Settings
Leads to the camera settings menu
Charging Status
Battery Symbol
Shows the current charging status of MHC and tablet
Pressure Indicator
Internal Pressure
Please check the internal pressure before use. If it falls below 0.5 bar, refill. (Target pressure: 0.8 bar).
TILT UP
Tilt camera upwards
Center camera/Reset zoom
Level Symvol
TILT DOWN
Tilt camera downwards
Zoom in
Magnifying glass/plus icon
Zoom out
Magnifying glass/minus icon
Manual Focus
Focus Symbol
Opens function keys for manually adjusting the focus area.
Report
Document Symbol
Generate a report.
Control Lighting
Slider
- Move slider to the left: Decreases lighting intensity
- Move slider to the right: Increases lighting intensity
- NEAR: Near Field
- TRANS: Transition Field
- FAR: Far Field
Distance Display
Laser Measurement Symbol
Press the laser measurement icon: Distance measurement is started. A display appears next to the button in the user interface and shows the measured distance in meters and centimeters.
Focus Adjustment Buttons
Plus/Minus Symbol
Press the plus button: The focus is manually adjusted closer to the subject.
Press the minus button: The focus is manually adjusted further away.
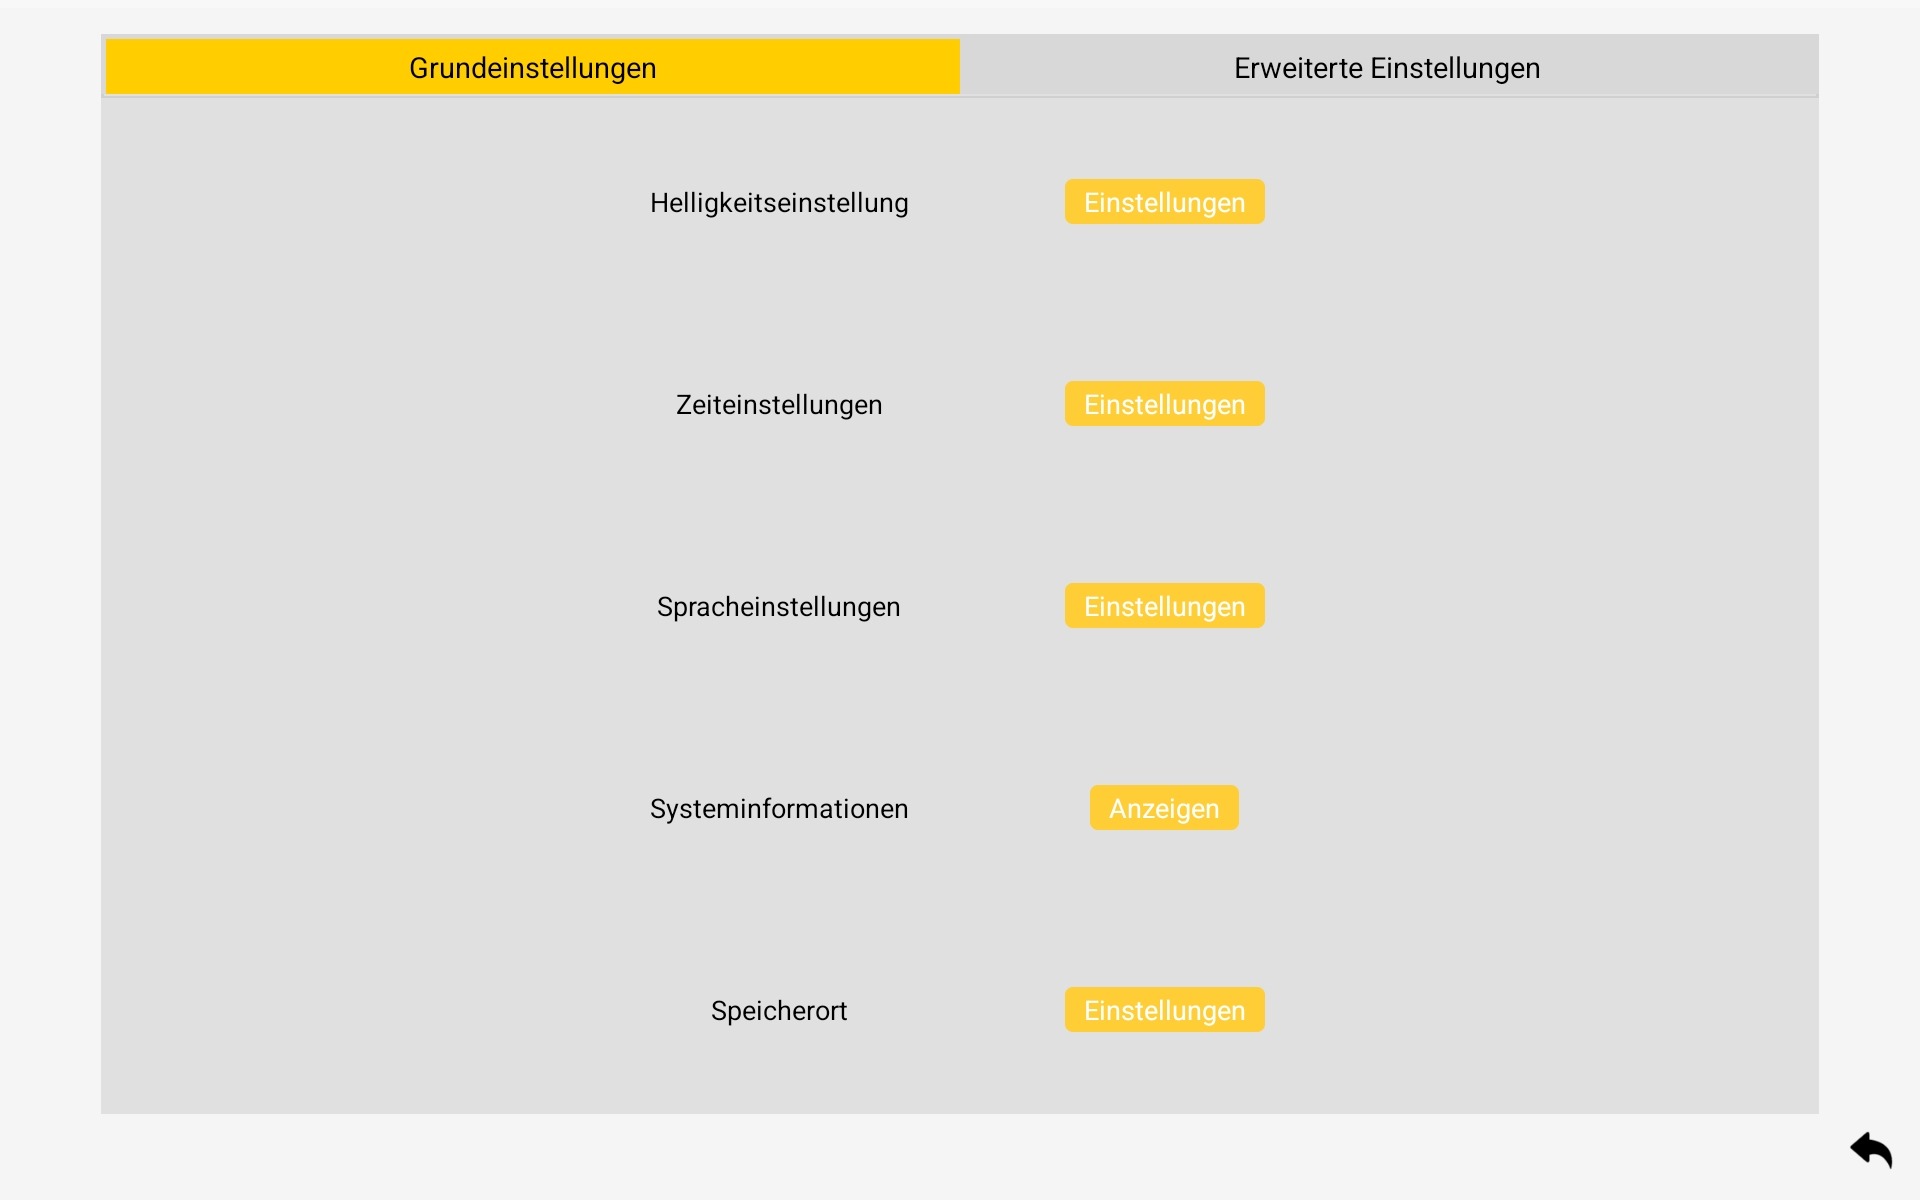
Set or change storage location
Quick guide
The Storage Location in the basic settings determines where the recorded data is saved.
Initial Setup
During the initial installation, the user must select a storage location for the data.
Change the storage location later
- Open the Settings menu.
- Select Storage location.
- Decide:
- Create a new folder, or
- Select an existing folder.
- Check the save path.
- Confirm with Use this folder.
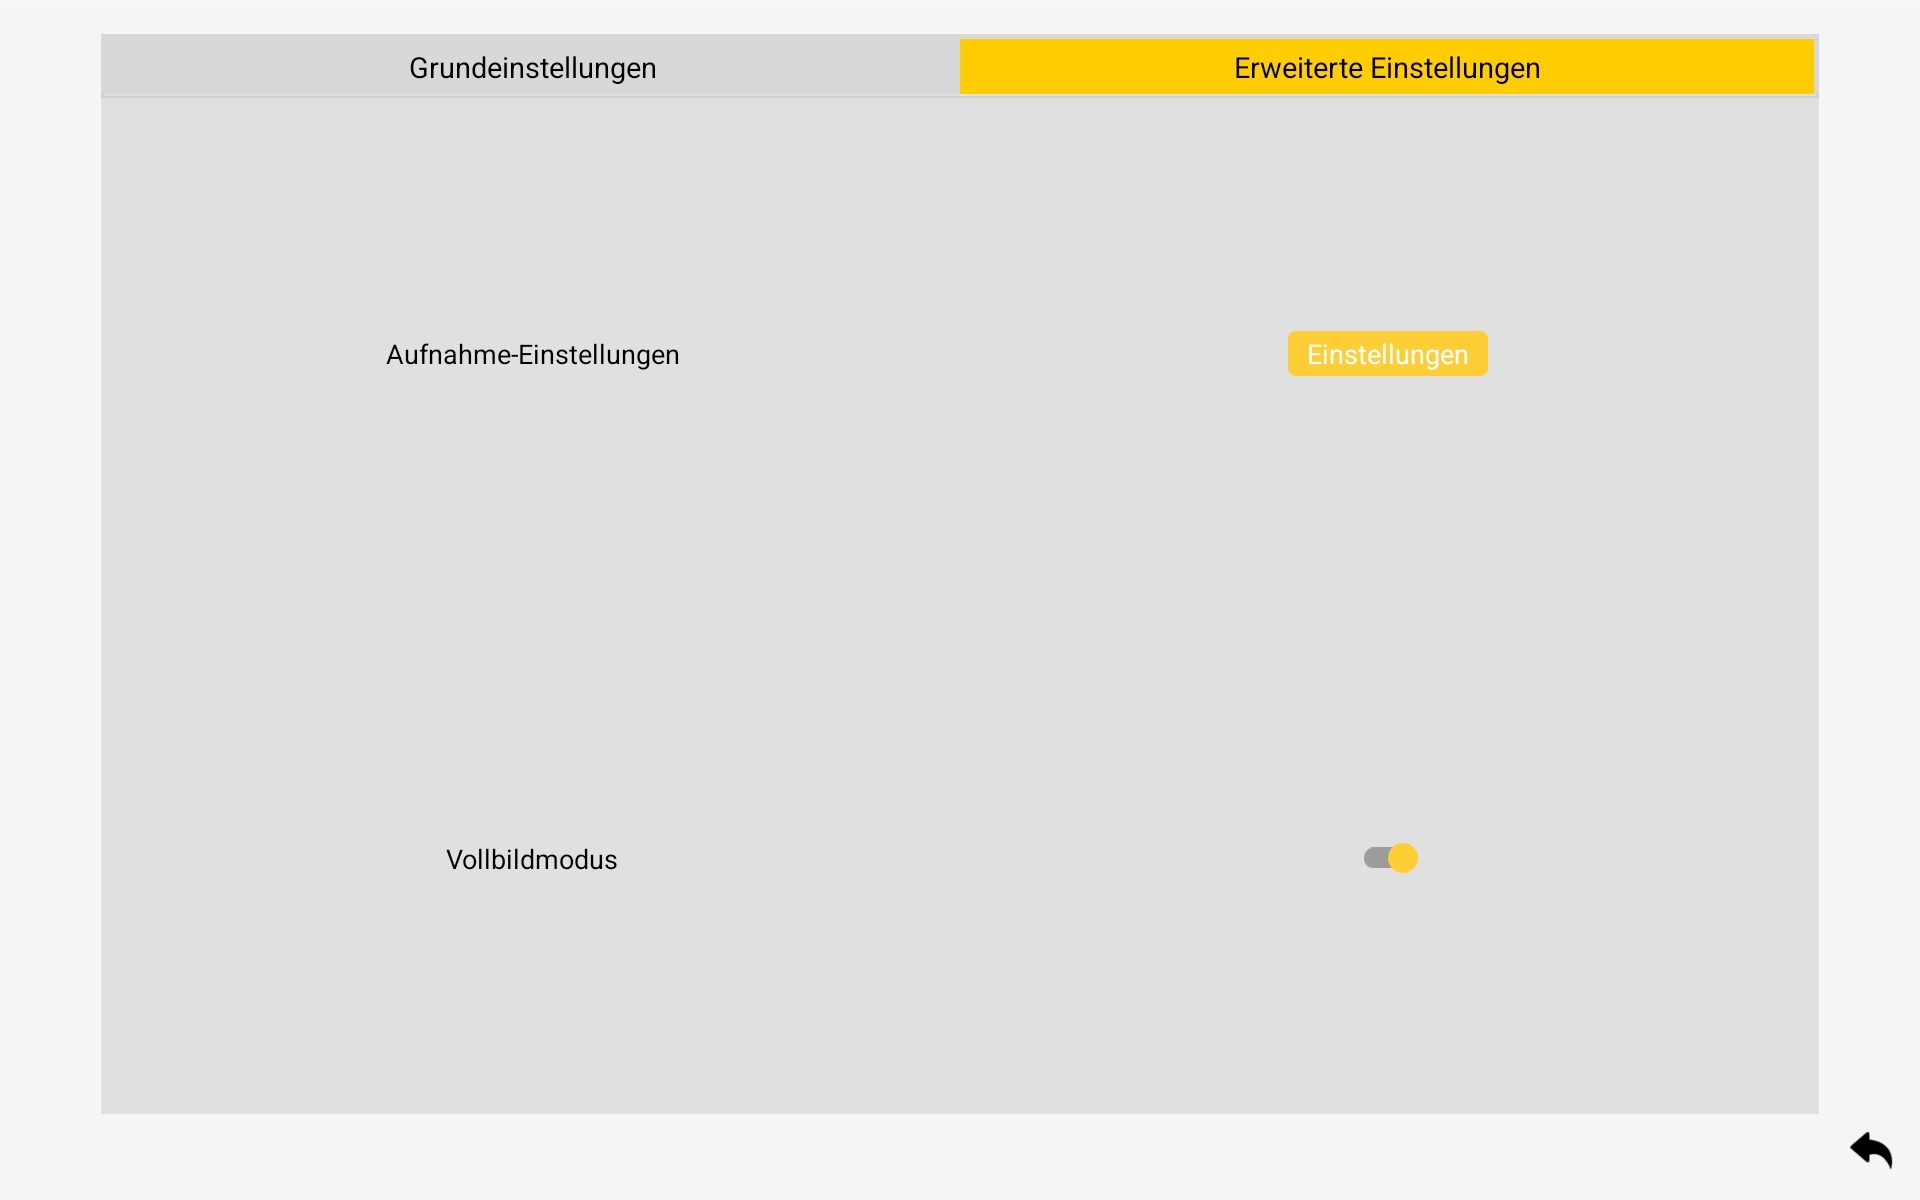
Advanced Settings

Open Advanced Settings
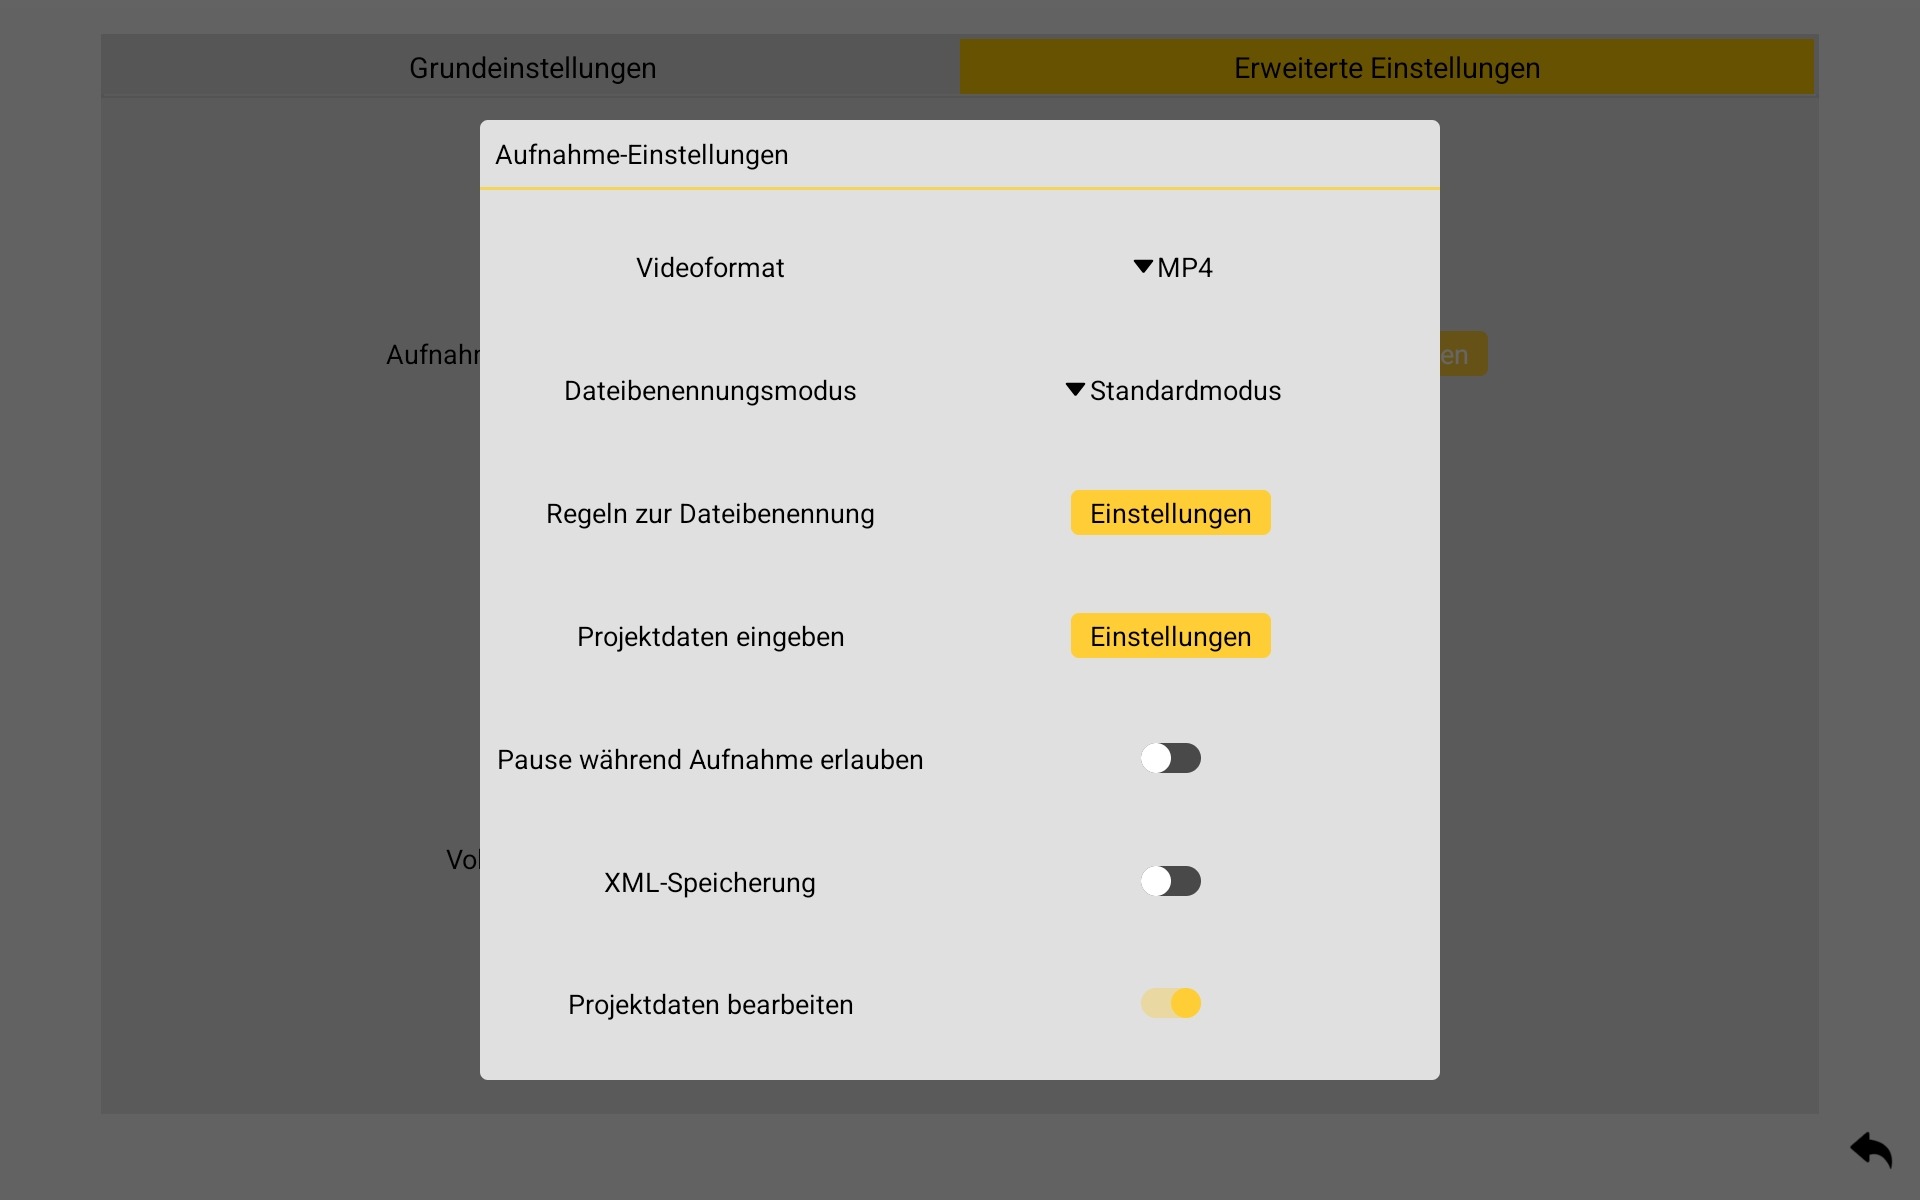
Under Settings → Advanced Settings, you can adjust additional options for working with the system.
Possible Adjustments
- Change the output video format
- Set file naming rules
- Store and manage project data
The changes you make will have an immediate impact on future recordings and projects.
Settings
Advanced Settings
Under Settings → Advanced Settings, you can adjust additional options for working with the system.
Possible Adjustments
- Change the output video format
- Set file naming rules
- Store and manage project data
The changes you make will have an immediate impact on future recordings and projects.
Maintenance and service
The device is essentially maintenance-free. Always keep the device clean and clean it after use. We recommend having the device inspected by your service partner, depending on usage, but at least once every 12 months. Should the device fail despite careful manufacturing and testing procedures, repairs must be carried out by an authorized customer service center or service partner.
For all inquiries and spare parts orders, please be sure to include the device’s serial number and the information on the rating plate.
Transport
Preparation of transport
- Ensure packaging: Ensure that the device is properly secured or packaged.
- Check stability: Ensure that the channel mirror is stable and securely fixed in the transport box.
Means of transport
Selecting the means of transport: Select a suitable means of transport that ensures the safe transport of the device. Ensure that the means of transport offers sufficient space and that the load can be securely secured.
Load securing: Securely fasten the channel mirror or transport box to the means of transport. Use straps or other securing devices to prevent slipping or tipping during transport.
When sending by mail, ensure proper packaging; you are welcome to use the original packaging.
During transport
Careful handling: Be careful when loading and unloading the channel mirror. Avoid shocks and vibrations that could cause damage.
After Transport
Safe Storage: Store the MHC in a safe and dry place until ready for use. Observe the general rules for storing batteries.
Notice
After transporting or storing the device in extreme temperatures, it is necessary to acclimatize it before use. Allow the device to stand at room temperature (approximately 20°C) for at least 2 hours to prevent condensation and possible damage caused by temperature fluctuations. This ensures optimal functionality and longevity of the device.
Troubleshooting
No or bad picture
- Check the Wi-Fi connection between the camera head and the tablet
- Check the camera head lens
No or poor WIFI Connection
The following conditions may result in reduced video quality or interrupted video signal:
In areas with a high number of Wi-Fi networks, signal and communication disruptions between the camera and the control tablet may occur.
If necessary, use the repeater to obtain a stronger signal.
Safety Instructions
Laser Warning
- When using the distance meter, pay attention to the laser class.
- Looking directly into the laser beam can cause eye damage.
Action: Never intentionally look into the laser beam or use optical instruments to view the beam.
Danger of falling
Check the fit of the telescopic pole and repeater before use.
Device Return and Disposal
Legal regulations
The device must be disposed of in accordance with applicable legal regulations. These include, in particular, the Waste Management Act (KrWG) and the Electrical and Electronic Equipment Act (ElektroG).
Environmentally friendly disposal
Ensure that the device is disposed of in an environmentally friendly manner to avoid negative impacts on the environment. Separate the individual parts (e.g., batteries). Do not dispose of the sewer mirror in general waste or unsorted commercial waste.
Purely commercially used devices
This device is a “purely commercial device” within the meaning of the WEEE Directive and may not be disposed of at municipal collection points like consumer devices such as washing machines, video recorders, or standard PCs.
Notice
The WEEE symbol of the crossed-out wheeled bin on your device indicates that it is a WEEE-relevant device that must be disposed of separately. This symbol is not mandatory in EU countries such as Germany for purely commercially used devices, but is used consistently throughout Europe by NSP3CT.PRO GmbH. The symbol does not imply return to municipal collection points!
If you need assistance with disposal or material regulations, please contact us.
Warranty conditions
Scope
These warranty conditions apply to all electronic devices with batteries sold by our company in the B2B sector.
Warranty period
The warranty period is 12 months from the date of purchase. The warranty period begins on the invoice date.
Warranty services
- Repair or Replacement: During the warranty period, defective devices will be repaired or replaced at our discretion.
- Refund: If repair or replacement is not possible, we will refund the purchase price.
Exclusions
The following are excluded from the warranty:
- Damage caused by improper handling, installation, or use.
- Damage caused by external influences such as fire, water, or force majeure.
- Consumable parts, such as batteries, which are subject to natural wear and tear.
Procedure in the event of a warranty claim
- Contact: In the event of a warranty claim, please contact our customer service or your local service partner.
- Return: Send the defective device back to us along with a return form and a detailed description of the fault.
- Processing: After receiving and inspecting the device, we will initiate the necessary steps to fulfill the warranty.
Legal Information
Our operating instructions, manuals, and software are protected by copyright.
Copying, reproduction, translation, or conversion into any electronic medium or machine-readable form, in whole or in part, is prohibited without the prior written permission of NSP3CT.PRO GmbH.
Publisher:
NSP3CT.PRO GmbH
Am Galgenbichl 14
87509 Immenstadt im Allgäu
Germany
